Quick Start#
This guide walks you through setting up a new Node.js API from the boilerplate template — from cloning the repo to having a fully working application with database connectivity, testing, CI/CD, and observability.
Table of Contents#
- Create a new repository
- Clone the Template Repository
- Disable CI Pipeline (Temporary)
- Reset Git History and Push to the New Repository
- Add VS Code Extension Recommendations
- Enable Format on Save (Local Workspace)
- Remove Kubernetes Configuration
- Update Node.js Version
- Replace ESLint Configuration
- Update ESLint Dependencies
- Add Formatting Script
- Update Project Metadata
- Upgrade Express to Version 5
- Update the Default HTML Page
- Database Tooling
- Create Your First Migration
- Database Setup
- Data Access Layer (DAL)
- Error Handling
- Testing Setup
- Prometheus Metrics
- Sentry Error Tracking
- API Authentication Middleware
- Swagger API Documentation
- Re-enable CI Pipeline
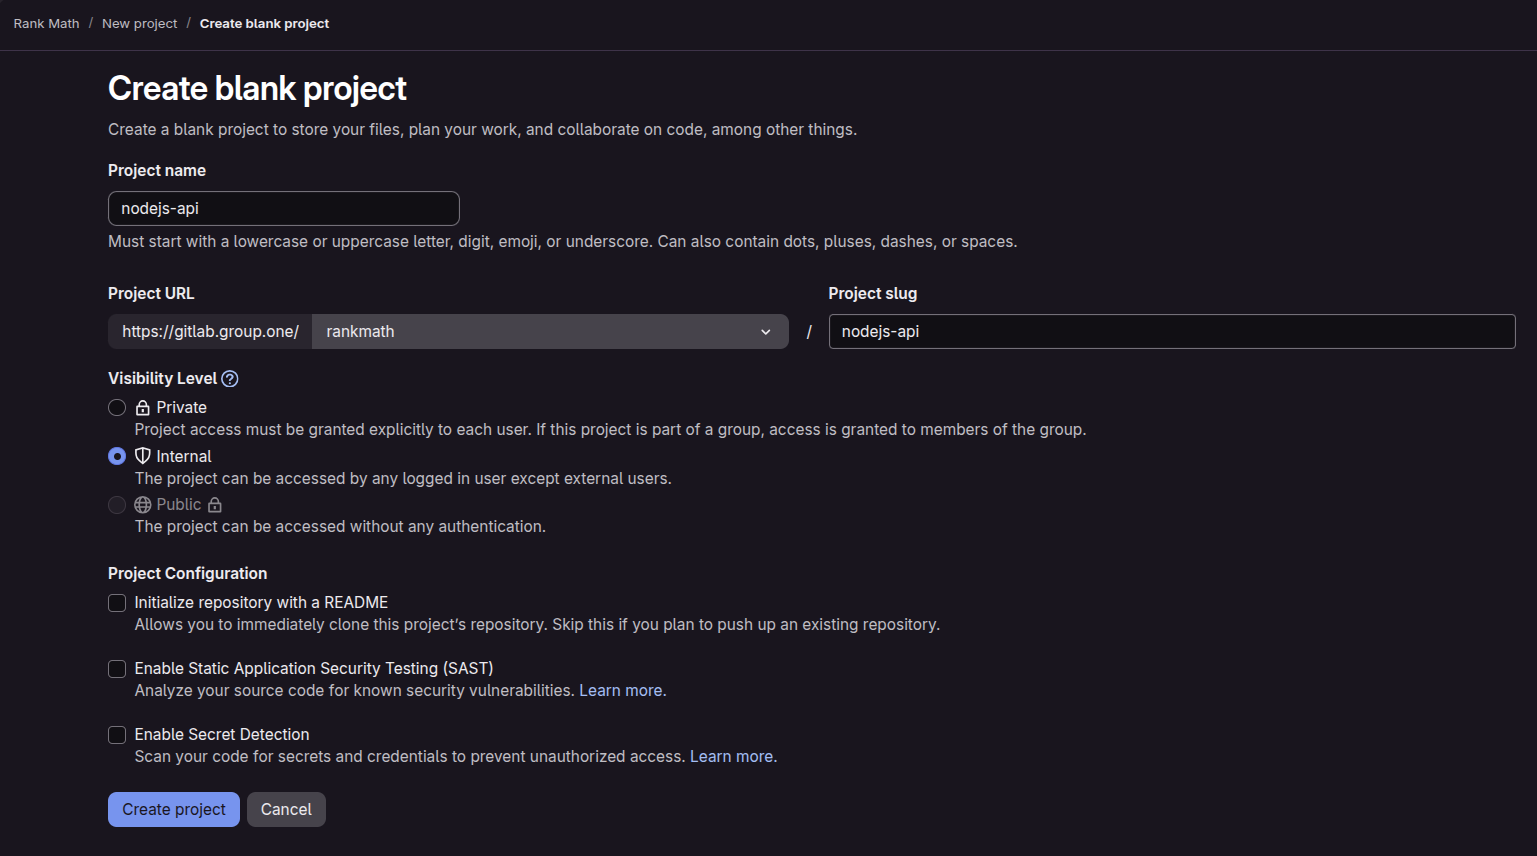
Create a new repository#
Create a new empty repository in gitlab
(replace the project name with your actual project name)
Clone the Template Repository#
Clone the template repository and specify your project name as the target directory:
git clone git@gitlab.group.one:saas/napp.git <project-name>
# e.g. git clone git@gitlab.group.one:saas/napp.git nodejs-api
Disable CI Pipeline (Temporary)#
Delete the GitLab CI configuration to prevent the pipeline from running during initial setup:
rm .gitlab-ci.yml
Reset Git History and Push to the New Repository#
Remove the existing Git history and reinitialize the repository:
cd nodejs-api
rm -rf .git
git init
For consistency, we use main as the protected default branch.
If the initialized branch is not main, rename it:
git branch -m main
Add the new remote and push the initial commit:
git remote add origin git@gitlab.group.one:rankmath/nodejs-api.git
git add .
git commit -m "Initial commit"
git push --set-upstream origin main
Add VS Code Extension Recommendations#
For consistency and ease of setup, we use Visual Studio Code as the recommended editor.
To ensure consistent formatting and linting across the team, add VS Code extension recommendations.
Create the following file:
.vscode/extensions.json
{
  "recommendations": [
    "editorconfig.editorconfig",
    "esbenp.prettier-vscode",
    "dbaeumer.vscode-eslint"
  ]
}
Enable Format on Save (Local Workspace)#
For convenience during development, you may enable format on save in your local VS Code workspace.
Note:
.vscode/settings.jsonis ignored by Git and is not committed to the repository.
Create the following file locally:
.vscode/settings.json
{
  "editor.formatOnSave": true
}
This setting applies only to your local workspace and helps ensure files are automatically formatted when saved.
Remove Kubernetes Configuration#
Deployment is managed in a separate repository, so deployment-related files in this template are not required.
Remove the following:
rm -rf kubernetes
rm local_deploy.sh
Update Node.js Version#
Update the .nvmrc file to the following version:
22.14.0
If you are using nvm, you can then run:
nvm use
Replace ESLint Configuration#
Remove the legacy ESLint configuration file:
rm .eslintrc
Create a new ESLint configuration file:
eslint.config.js
import js from "@eslint/js";
import importPlugin from "eslint-plugin-import";
import globals from "globals";

export default [
  js.configs.recommended,
  importPlugin.flatConfigs.recommended,
  {
    languageOptions: {
      ecmaVersion: "latest",
      globals: { ...globals.nodeBuiltin },
    },
    rules: {
      "import/no-unresolved": "error", // Helps with import errors
    },
  },
  { ignores: ["test/site-scanning/test-sites/**/*"] },
];
Update ESLint Dependencies#
Remove the following dev dependencies:
eslint-config-prettiereslint-config-standard
npm uninstall eslint-config-prettier eslint-config-standard
Install the required ESLint dependencies:
npm install --save-dev @eslint/js globals
Add Formatting Script#
Add a formatting script to the existing scripts section in package.json.
"format": "prettier --write '**/*.js'"
Update Project Metadata#
Update the project metadata in package.json to match your new service.
At minimum, update the following fields:
name-> set this to your project name (for example: nodejs-api)author-> set this to the owning team (for example: RankMath Service Team)
Upgrade Express to Version 5#
Upgrade Express to version 5.x to simplify error handling.
{
  "dependencies": {
    "express": "^5.0.1"
  }
}
try/catch wrappers are no longer required.
Update the Default HTML Page#
The default HTML page served at /public/index.html still contains template-specific text.
Update the file, replacing occurrences of napp with your project name.
public/index.html
<h1>Nodejs API</h1>
This ensures that visiting http://localhost:$PORT displays a page that reflects your new service instead of the template.
Database Tooling#
This section covers the steps required to set up development database tooling.
We use PostgreSQL in our projects, as it is the officially supported database by the Infra team.
Copy the tools folder from this ai-rank-tracker:
- Source repo.
- Folder structure to copy:
tools/
  app-repl/
  bin/
  db/
  virtual-env.sh
Configure virtual-env.sh#
In tools/virtual-env.sh, update the following variables:
VENV_AI_RANK_TRACKER- Rename to match your project (e.g.VENV_NODEJS_API).POSTGRES_USER- Use a project specific value (e.g.nodejs-api-dev).POSTGRES_DB- Can matchPOSTGRES_USER(e.g.nodejs-api-dev).POSTGRES_PORT- Pick an unused port. If you run other RankMath services locally, note these ports:seo-platform: 54321content-ai: 54322ai-rank-tracker: 54324
POSTGRES_DOCKER_NAME- Use a recognizable container name (e.g.rm-nodejs-api-dev)
Load the environment#
Source the environment script:
source tools/virtual-env.sh
If you see:
❌ Error: tools/sensitive-env.sh does not exist.
  👉 Please create it with your sensitive variables.
  See README under 'Configure sensitive environment variables' for details.
Create tools/sensitive-env.sh, then run the source command again.
You may then see:
❌ Missing required environment variables:
  -  OPENAI_API_KEY SENTRY_DSN
👉 Please define them in tools/sensitive-env.sh
For initial setup, define placeholders (replace with real values later):
OPENAI_API_KEY="placeholder"
SENTRY_DSN="placeholder"
Adding your own sensitive variables#
When your project needs additional secrets (API keys, tokens, etc.), add them to the _require_envs call in tools/virtual-env.sh:
_require_envs OPENAI_API_KEY SENTRY_DSN MY_NEW_SECRET || return 1
This ensures all required secrets are validated when developers source the environment — if any are missing, the script exits with a clear error.
Add sensitive-env.sh in .gitignore
tools/sensitive-env.sh
Re-run:
source tools/virtual-env.sh
You should see output similar to:
########################################
# Setting up environment variables
########################################
# Setting up sensitive environment variables
########################################
# ✅ All sensitive environment variables are set
########################################
# ✅ All sensitive environment variables are set

########################################
# Setting up node
node version is 22.14.0
Available DB commands#
After sourcing, you can list DB commands by typing db in the terminal and pressing Tab.
$ db
destroy      migrate      repl         restore      snapshot     start        sync-schema
Start the development database#
db start
If you don’t already have the Postgres Docker image locally, it will be pulled automatically and a new container will be created using the database credentials defined in the sourced environment variables.
Open the DB REPL#
db repl
You should be connected to your database (example):
─➤  db repl;
psql (17.4 (Debian 17.4-1.pgdg120+2))
Type "help" for help.

nodejs-api-dev=# select now();
              now
-------------------------------
 2026-02-05 09:20:05.417558+00
(1 row)

nodejs-api-dev=#
Create Your First Migration#
Create the migrations directory:
mkdir -p database/migrations
Write your first migration file.
Follow the naming convention NNN-t_<description>.sql:
001-t_example.sql
002-t_users.sql
021-t_add_index_on_keys_api_key_and_users_username.sql
database/migrations/001-t_example.sql
CREATE TABLE example (
    id SERIAL PRIMARY KEY,
    uuid UUID NOT NULL DEFAULT gen_random_uuid() UNIQUE,
    name TEXT NOT NULL,
    created_at TIMESTAMP NOT NULL DEFAULT CURRENT_TIMESTAMP,
    updated_at TIMESTAMP NOT NULL DEFAULT CURRENT_TIMESTAMP
);
We use both
id(SERIAL) anduuid(UUID) for each table. Theidis used internally for performance (indexing, joins), while theuuidis exposed in the API for security. See Database Management for details.
Run the migration:
db migrate
You should see output similar to:
Applying 001-t_example.sql (/path/to/database/migrations/001-t_example.sql)
Successfully applied all migrations.
Verify by opening the database REPL:
db repl
nodejs-api-dev=# \dt
             List of relations
 Schema |    Name    | Type  |     Owner
--------+------------+-------+----------------
 public | example    | table | nodejs-api-dev
 public | migrations | table | nodejs-api-dev
(2 rows)
For day-to-day database workflows — snapshots, restores, iterating on migrations, and the application REPL — see Database Development Tools.
Database Setup#
This section covers how the application connects to the PostgreSQL database.
If you want to understand the design decisions and rationale, see the Database Management section.
The service uses the pg driver directly, without an ORM or query builder.
The database connection is initialized during application bootstrap and registered in the service locator.
Install Dependencies#
Install the PostgreSQL driver, the service locator library, and the HTTP errors library:
npm install pg dislocator http-errors
Create the Database Connection Class#
Create the following file:
lib/Database.js
import pg from "pg";

export default class Database {
  constructor(dbConfig, debugMode = false) {
    this.pool = new pg.Pool(dbConfig);
    this.debug = debugMode;
  }

  async close(timeout = 0) {
    let timeoutHandle;
    if (typeof timeout === "number" && timeout > 0) {
      timeoutHandle = setTimeout(() => {
        console.error(
          `Timeout after ${timeout} ms. Forcefully releasing all clients...`,
        );
        this.pool._clients.forEach((client) => client.release());
      }, timeout);
    }
    await this.pool.end();
    if (timeoutHandle) {
      clearTimeout(timeoutHandle);
    }
  }

  async getClient() {
    return this.pool.connect();
  }

  async query(text, params) {
    const start = Date.now();
    const res = await this.pool.query(text, params);
    const duration = Date.now() - start;

    if (this.debug) {
      console.log("executed query", { text, duration, rows: res.rowCount });
    }
    return res;
  }
}
For a deeper understanding of this class, see the Database Management section.
Create the Config Service#
The config service reads environment variables and validates that all required values are present.
Create the following directory and file:
mkdir -p lib/services
lib/services/config.js
export const isProduction = process.env.NODE_ENV === "production";
export const isDevelopment = !isProduction;

const missingRequiredEnvironmentVariables = new Set();

function getEnv(name, defaultValue = null) {
  const value = process.env[name] || defaultValue;
  if (!value && !defaultValue) missingRequiredEnvironmentVariables.add(name);
  return value;
}

function exitIfMissingRequiredEnv() {
  if (missingRequiredEnvironmentVariables.size > 0) {
    let details = [...missingRequiredEnvironmentVariables].map(
      (str) => `\n - ${str}`,
    );

    if (isDevelopment) {
      details += `\n\nDid you load the virtual environment?\n\nsource tools/virtual-env.sh\n`;
    }

    throw new Error("Missing required environment variables." + details);
  }
}

export default function registerConfigService(serviceLocator) {
  serviceLocator.register("config", {
    db: {
      user: getEnv("POSTGRES_USER"),
      password: getEnv("POSTGRES_PASSWORD"),
      host: getEnv("POSTGRES_HOST"),
      port: getEnv("POSTGRES_PORT"),
      database: getEnv("POSTGRES_DB"),
      ssl:
        getEnv("POSTGRES_SSL") === "require"
          ? { rejectUnauthorized: false }
          : undefined,
    },
    masterAPIKey: getEnv("MASTER_API_KEY"),
  });

  exitIfMissingRequiredEnv();
}
Add any project-specific configuration values to the config object as needed.
Create the Database Service#
lib/services/database.js
import Database from "../Database.js";

export default function registerDatabaseService({ config }) {
  return new Database(config.db);
}
Create the Service Locator#
lib/service-locator.js
import ServiceLocator from "dislocator";
import registerDatabaseService from "./services/database.js";
import registerConfigService from "./services/config.js";

export default function createServiceLocator() {
  const serviceLocator = new ServiceLocator();

  serviceLocator
    .use(registerConfigService)
    .register("db", registerDatabaseService(serviceLocator));

  return serviceLocator;
}
Register additional services here as your application grows. For more details about the Service Locator pattern, see the Service Locator section.
Update server.js#
Replace the contents of server.js with:
import appFactory from "./lib/app.js";
import createServiceLocator from "./lib/service-locator.js";

const PORT = process.env.PORT || 3000;
const NODE_ENV = process.env.NODE_ENV || "development";

const serviceLocator = createServiceLocator();

const db = serviceLocator.db;
await db.query("SELECT 1"); // Test DB connection

const app = appFactory(serviceLocator);

const server = app.listen(PORT, () => {
  console.log("HTTP: Now listening on port", PORT);
});

process.on("SIGTERM", () => {
  const sleep = (ms) => new Promise((resolve) => setTimeout(resolve, ms));
  const shutdownApp = () => new Promise((resolve) => server.close(resolve));

  const SHUTDOWN_GRACE_PERIOD = 10 * 1000;

  (async function () {
    console.log("Received SIGTERM, initiating shutdown procedure.");

    if (NODE_ENV === "production") {
      console.log(`Waiting ${SHUTDOWN_GRACE_PERIOD / 1000} seconds...`);
      await sleep(SHUTDOWN_GRACE_PERIOD);
    }

    console.log("Stopping server from accepting new connections...");
    await shutdownApp();

    console.log("Closing database connections...");
    await db.close();

    console.log("Shutdown routine complete.");
    process.exit();
  })();
});
Key changes from the boilerplate:
- The service locator is created and used to bootstrap the app
- The database connection is tested on startup (SELECT 1)
- Database connections are closed during graceful shutdown
Update lib/app.js#
Replace lib/app.js to use the app factory pattern:
import express from "express";

export default function appFactory(serviceLocator) {
  const db = serviceLocator.db;

  const app = express();
  app.use(express.json());

  app.get("/api/ping", async (_, res) => {
    const result = await db.query("SELECT NOW() as timestamp", []);
    res.json({ message: "pong", data: result.rows });
  });

  app.get("/api/time", async (_, res) => {
    res.setHeader(
      "Cache-Control",
      "no-store, no-cache, must-revalidate, proxy-revalidate",
    );
    res.setHeader("Pragma", "no-cache");
    res.setHeader("Expires", "0");

    res.json({ time: new Date() });
  });

  return app;
}
Key changes:
- The app is now created by a factory function that receives the service locator
- The /api/ping endpoint now tests the database connection
- JSON body parsing is enabled
Add the prestart Script#
Add a prestart script to package.json to remind developers to load the virtual environment:
"prestart": "if [ -z \"$VENV_NODEJS_API\" ] ; then echo source tools/virtual-env.sh && echo && false ; fi"
Replace
VENV_NODEJS_APIwith the environment variable name you defined intools/virtual-env.sh.
Verify the Setup#
Source the environment and start the server:
source tools/virtual-env.sh
db start
npm start
Visit http://localhost:3000/api/ping — you should see a response containing the current database timestamp:
{
  "message": "pong",
  "data": [{ "timestamp": "2026-02-05T09:20:05.417Z" }]
}
Data Access Layer (DAL)#
The Data Access Layer encapsulates all database queries behind a clean interface. Routes never write SQL directly — they call DAL methods instead. This keeps SQL in one place and makes the code easier to test and maintain.
For a deeper look at the DAL pattern and pagination, see the Database Management section.
Create the Directory#
mkdir -p lib/dal
Create a Table DAL Class#
Each database table gets its own DAL class with methods for the operations it supports.
Method naming: Use plain action names (e.g.,
create,getByUuid,deleteByUuid) rather than domain-prefixed names (e.g.,createExample,getExampleByUuid). The class name already provides the domain context.
Using the example table from the migration section:
lib/dal/ExampleDAL.js
export class ExampleDAL {
  constructor(db) {
    this.db = db;
  }

  async create(payload) {
    const result = await this.db.query(
      `INSERT INTO example (name) VALUES ($1)
       RETURNING uuid, name, created_at`,
      [payload.name],
    );

    const record = result.rows[0];
    if (!record) return null;

    const { uuid, name, created_at } = record;

    return {
      uuid,
      name,
      created_at,
    };
  }

  async getByUuid(uuid) {
    const result = await this.db.query(
      `SELECT uuid, name, created_at, updated_at
       FROM example WHERE uuid = $1`,
      [uuid],
    );

    const record = result.rows[0];
    if (!record) return null;

    const { name, created_at, updated_at } = record;

    return {
      uuid,
      name,
      created_at,
      updated_at
    };
  }

  async deleteByUuid(uuid) {
    const result = await this.db.query(
      `DELETE FROM example WHERE uuid = $1`,
      [uuid],
    );

    return result.rowCount === 1;
  }
}
Be explicit about what each method returns. Rather than passing through the raw database row, destructure and return only the fields that make up the entity. This standardizes the shape that the rest of the application works with and prevents internal columns from leaking out.
Create the Main DAL Class#
The main DataAccessLayer class composes all table DALs into a single object. As you add more tables, register their DALs here.
lib/dal/DAL.js
import { ExampleDAL } from "./ExampleDAL.js";

export default class DataAccessLayer {
  constructor(db) {
    this.db = db;
    this.example = new ExampleDAL(db);
  }
}
Create the DAL Service#
lib/services/dal.js
import DataAccessLayer from "../dal/DAL.js";

export default function registerDalService(serviceLocator) {
  serviceLocator.register(
    "dal",
    () => new DataAccessLayer(serviceLocator.get("db")),
  );
}
Update the Service Locator#
Add the DAL service to lib/service-locator.js:
import ServiceLocator from "dislocator";
import registerDatabaseService from "./services/database.js";
import registerConfigService from "./services/config.js";
import registerDalService from "./services/dal.js";

export default function createServiceLocator() {
  const serviceLocator = new ServiceLocator();

  serviceLocator
    .use(registerConfigService)
    .use(registerDalService)
    .register("db", registerDatabaseService(serviceLocator));

  return serviceLocator;
}
Usage in Routes#
The DAL is now available via serviceLocator.dal. Here is an example of how a route handler would use it:
app.post("/api/v1/example", async (req, res) => {
  const result = await serviceLocator.dal.example.create({
    name: req.body.name,
  });

  res.status(201).json({
    uuid: result.uuid,
    name: result.name,
    created_at: result.created_at,
  });
});

app.get("/api/v1/example/:uuid", async (req, res) => {
  const result = await serviceLocator.dal.example.getByUuid(req.params.uuid);
  if (!result) {
    throw new httpErrors.NotFound("Record not found");
  }

  res.json({
    uuid: result.uuid,
    name: result.name,
    created_at: result.created_at,
    updated_at: result.updated_at,
  });
});
For the recommended way to organize routes into separate handler files, see the API Structure & Routing section.
Error Handling#
This section covers setting up centralized error handling.
For the full rationale and design decisions, see the Error Handling section.
Create the Error Handler#
lib/errorHandler.js
import httpErrors from "http-errors";

function isBlessedError(err) {
  return err instanceof httpErrors.HttpError;
}

export function errorHandler() {
  return (err, req, res, next) => {
    if (res.headersSent) {
      return next(err);
    }

    if (process.env.NODE_ENV === "test") {
      console.error(`[TEST ERROR] ${err.name}: ${err.message}`);
    } else {
      console.error(err);
    }

    if (!isBlessedError(err)) {
      const presentableError = new httpErrors.InternalServerError(
        "Internal Server Error",
        { cause: err },
      );
      err = presentableError;
    }

    res.status(err.status || 500).json({ message: err.message });
  };
}
Blessed errors (instances of httpErrors.HttpError) are forwarded to the client as-is — they are considered safe to expose.
All other errors are masked as a 500 Internal Server Error to avoid leaking internal details.
Register the Error Handler#
Update lib/app.js to include the error handler as the last middleware:
import express from "express";
import { errorHandler } from "./errorHandler.js";

export default function appFactory(serviceLocator) {
  const db = serviceLocator.db;
  const app = express();
  app.use(express.json());

  // ... routes ...

  app.use(errorHandler());

  return app;
}
Express 5 automatically catches errors thrown in async route handlers, so explicit try/catch blocks are not required. Thrown httpErrors (e.g., throw new httpErrors.BadRequest("...")) will be caught and forwarded to the error handler.
Testing Setup#
This section covers setting up the testing infrastructure using Jest and Supertest.
Install Dependencies#
npm install --save-dev jest supertest
Create Test Configuration#
Create a unit test configuration:
jest.unit.config.js
export default {
  testMatch: ["<rootDir>/test/unit/**/*.test.js"],
  transform: {},
  testEnvironment: "node",
};
Create an integration test configuration:
jest.integration.config.js
export default {
  globalSetup: "./test/setup/globalSetup.js",
  globalTeardown: "./test/setup/globalTeardown.js",
  testMatch: ["<rootDir>/test/**/**/*.integration.test.js"],
  transform: {},
  testEnvironment: "node",
};
Create Test Directory Structure#
mkdir -p test/setup test/unit test/integration
Create Test Database Utilities#
Integration tests use a separate database container so they never touch your development data. The setup spins up a dedicated Docker container, runs migrations, and tears it down when tests finish.
test/setup/utils.js
import { runShellCommand } from "../../tools/db/utils.js";

export async function setupTestDatabase() {
  if (process.env.NODE_ENV !== "test") return;

  console.log("\nSetting up test database");

  // Override environment variables to use a separate test database
  process.env.POSTGRES_USER = "nodejs-api-test";
  process.env.POSTGRES_DB = "nodejs-api-test";
  process.env.POSTGRES_DOCKER_NAME = "rm-nodejs-api-test";
  process.env.POSTGRES_PORT = 54326;

  await runShellCommand("node tools/bin/db start");

  // Wait for the database to be ready
  let err;
  do {
    const result = await runShellCommand("node tools/bin/db migrate");
    err = result.err;
    if (!err) break;
    console.log(`Migration failed: ${err.message}. Retrying in 1s.`);
    await new Promise((resolve) => setTimeout(resolve, 1000));
  } while (err);
}

export async function teardownTestDatabase() {
  if (process.env.NODE_ENV !== "test") return;

  console.log("Tearing down test database");
  await runShellCommand("node tools/bin/db destroy");
}
Adjust the
POSTGRES_USER,POSTGRES_DB,POSTGRES_DOCKER_NAME, andPOSTGRES_PORTvalues to match your project. The port must differ from your development database port to avoid conflicts.
Create Global Test Setup#
The global setup creates the test database, then builds a service locator and makes it available to all tests.
test/setup/globalSetup.js
import createServiceLocator from "../../lib/service-locator.js";
import { setupTestDatabase } from "./utils.js";

export default async function globalSetup() {
  await setupTestDatabase();

  const serviceLocator = createServiceLocator();

  // Store for use in tests
  global.__SERVICE_LOCATOR__ = serviceLocator;
}
test/setup/globalTeardown.js
import { teardownTestDatabase } from "./utils.js";

export default async function globalTeardown() {
  await global.__SERVICE_LOCATOR__.db.close();
  await teardownTestDatabase();
}
Create a Test App Factory#
For integration tests, create a helper that builds a test instance of the Express app:
test/setup/create-test-app.js
import appFactory from "../../lib/app.js";

export default function createTestApp() {
  const serviceLocator = globalThis.__SERVICE_LOCATOR__;

  const app = appFactory(serviceLocator);

  return { app, serviceLocator };
}
Update Test Scripts#
Update the scripts section in package.json:
"test": "npm run test:unit && npm run test:integration",
"test:unit": "node --experimental-vm-modules node_modules/jest/bin/jest.js --config jest.unit.config.js",
"test:integration": "node --experimental-vm-modules node_modules/jest/bin/jest.js --config jest.integration.config.js --runInBand --detectOpenHandles"
The
--experimental-vm-modulesflag is required for Jest to work with ES modules. The--runInBandflag runs integration tests sequentially to avoid database conflicts.
Write an Integration Test#
Create an integration test to verify the setup:
test/integration/api/example.integration.test.js
import request from "supertest";
import createTestApp from "../../setup/create-test-app.js";

const dal = global.__SERVICE_LOCATOR__.dal;
const db = global.__SERVICE_LOCATOR__.db;

describe("Example API", () => {
  let app;

  beforeAll(() => {
    ({ app } = createTestApp());
  });

  afterEach(async () => {
    await db.query("DELETE FROM example");
  });

  it("GET /api/ping should return pong", async () => {
    const response = await request(app).get("/api/ping").expect(200);

    expect(response.body.message).toBe("pong");
  });

  it("POST /api/v1/example should create a record", async () => {
    const response = await request(app)
      .post("/api/v1/example")
      .send({ name: "test" })
      .expect(201);

    expect(response.body).toEqual({
      uuid: expect.any(String),
      name: "test",
      created_at: expect.any(String),
    });
  });

  it("GET /api/v1/example/:uuid should return a record", async () => {
    const record = await dal.example.create({ name: "test" });

    const response = await request(app)
      .get(`/api/v1/example/${record.uuid}`)
      .expect(200);

    expect(response.body).toEqual({
      uuid: record.uuid,
      name: "test",
      created_at: expect.any(String),
      updated_at: expect.any(String),
    });
  });
});
Run Tests#
Run unit tests only:
npm run test:unit
Run integration tests only (starts and destroys a test database automatically):
npm run test:integration
Run both:
npm test
Prometheus Metrics#
This section covers exposing application metrics via a dedicated management server using prom-client.
The metrics endpoint runs on a separate port from the main application. This keeps internal observability endpoints away from public traffic and aligns with Kubernetes conventions for liveness probes and metrics scraping.
Install Dependencies#
npm install prom-client
Create the Management App#
The management app is a minimal Express server that exposes a liveness probe and a Prometheus metrics endpoint.
lib/app-mgmt.js
import express from "express";
import promClient from "prom-client";

export default function mgmtAppFactory() {
  const app = express();

  app.get("/liveness", (_req, res) => {
    res.end();
  });

  app.get("/metrics", (req, res, next) => {
    if (req.query.format && req.query.format !== "prometheus") {
      const err = new Error("Unsupported format.");
      err.status = 400;
      return next(err);
    }
    promClient.register.metrics().then(
      (data) => {
        res.set("Content-Type", promClient.register.contentType);
        res.end(data);
      },
      (err) => next(err),
    );
  });

  return app;
}
Update server.js#
Import the management app and start it alongside the main server:
import appFactory from "./lib/app.js";
import createServiceLocator from "./lib/service-locator.js";
import mgmtAppFactory from "./lib/app-mgmt.js";

const PORT = process.env.PORT || 3000;
const MGMT_PORT = process.env.MGMT_PORT || 0;
const NODE_ENV = process.env.NODE_ENV || "development";

const serviceLocator = createServiceLocator();

const db = serviceLocator.db;
await db.query("SELECT 1");

const app = appFactory(serviceLocator);

const server = app.listen(PORT, () => {
  console.log("HTTP: Now listening on port", PORT);
});

const mgmtServer = mgmtAppFactory().listen(MGMT_PORT, () => {
  console.log("MGMT: Now listening on port", mgmtServer.address().port);
});

process.on("SIGTERM", () => {
  const sleep = (ms) => new Promise((resolve) => setTimeout(resolve, ms));
  const shutdownApp = () => new Promise((resolve) => server.close(resolve));
  const shutdownMgmt = () => new Promise((resolve) => mgmtServer.close(resolve));

  const SHUTDOWN_GRACE_PERIOD = 10 * 1000;

  (async function () {
    console.log("Received SIGTERM, initiating shutdown procedure.");

    if (NODE_ENV === "production") {
      console.log(`Waiting ${SHUTDOWN_GRACE_PERIOD / 1000} seconds...`);
      await sleep(SHUTDOWN_GRACE_PERIOD);
    }

    console.log("Stopping server from accepting new connections...");
    await shutdownApp();

    console.log("Stopping management server...");
    await shutdownMgmt();

    console.log("Closing database connections...");
    await db.close();

    console.log("Shutdown routine complete.");
    process.exit();
  })();
});
Setting
MGMT_PORT=0lets the OS pick a random available port, which is printed on startup. In production, set an explicit port (e.g.,MGMT_PORT=3001).
Add Custom Metrics#
Define metrics where they are used, not in a centralized metrics file. This avoids unnecessary indirection and makes it immediately clear what each metric tracks. Since Prometheus scrapes metrics rather than having them pushed, there is no concern with updating values too frequently.
For example, add a request counter to the /api/time route in lib/app.js:
import promClient from "prom-client";

const timeRouteCounter = new promClient.Counter({
  name: "time_route_counter",
  help: "Counts requests to /api/time",
});

// Inside appFactory:
app.get("/api/time", async (_, res) => {
  timeRouteCounter.inc();

  res.setHeader(
    "Cache-Control",
    "no-store, no-cache, must-revalidate, proxy-revalidate",
  );
  res.setHeader("Pragma", "no-cache");
  res.setHeader("Expires", "0");

  res.json({ time: new Date() });
});
All metrics registered with prom-client are automatically included in the /metrics endpoint — no extra wiring needed.
Prefer counters over gauges. Counters let you build richer dashboards and drill into per-node performance. For example, instead of a single queue-length gauge updated on an interval, consider:
- Increment a
job_addedcounter when a job is submitted - Increment a
job_processedcounter (with astatuslabel:completed,errored) when a job finishes
const jobAdded = new promClient.Counter({
  name: "job_added_total",
  help: "Jobs submitted to the queue",
});

const jobProcessed = new promClient.Counter({
  name: "job_processed_total",
  help: "Jobs processed from the queue",
  labelNames: ["status"],
});

// When a job is submitted:
jobAdded.inc();

// When a job completes:
jobProcessed.inc({ status: "completed" });

// When a job fails:
jobProcessed.inc({ status: "errored" });
Verify#
Start the server and hit /api/time a few times, then check the metrics:
# Find the management port from the startup log, then:
curl http://localhost:<mgmt-port>/metrics
You should see Prometheus-formatted output including your custom counter:
# HELP time_route_counter Counts requests to /api/time
# TYPE time_route_counter counter
time_route_counter 3
Sentry Error Tracking#
This section covers integrating Sentry for error tracking and performance monitoring.
Sentry must be initialized before any other module is imported so it can instrument the application correctly. This is achieved using Node's --import flag, which loads a module before the application entry point.
Install Dependencies#
npm install @sentry/node @sentry/profiling-node
Create the Instrument File#
lib/instrument.js
import * as Sentry from "@sentry/node";
import { nodeProfilingIntegration } from "@sentry/profiling-node";

const environment = process.env.NODE_ENV || "development";
const isDebugEnv = ["development", "dev", "staging", "test"].includes(
  environment.toString(),
);

Sentry.init({
  dsn: process.env.SENTRY_DSN,
  environment,
  debug: isDebugEnv,

  integrations: [nodeProfilingIntegration()],
  profileSessionSampleRate: 0.0,

  tracesSampler({ name, inheritOrSampleWith }) {
    // Never sample health check endpoints
    if (name.includes("/api/ping") || name.includes("/api/time")) {
      return 0;
    }

    // Inherit parent sampling decision, or use a low fallback rate
    return inheritOrSampleWith(0.005);
  },

  sendDefaultPii: true,

  // Filter out errors you don't want reported
  beforeSend(event, hint) {
    const error = hint.originalException;

    // Example: skip known/expected errors
    // if (error instanceof MyCustomError && !error.reportToSentry) {
    //   return null;
    // }

    return event;
  },
});
The
tracesSamplercontrols how many transactions are sent to Sentry. Health-check endpoints are excluded entirely, and all other routes default to a low sample rate to stay within quota. Adjust the fallback rate to match your plan.The
beforeSendhook lets you filter out errors that shouldn't be reported — for example, expected validation errors or custom application errors that are already handled. Returnnullto drop the event, or returneventto send it.
Update the Start Script#
Update the start script in package.json to load the instrument file before the application:
"start": "node --watch --import ./lib/instrument.js server.js"
In the Dockerfile, use the same flag:
CMD ["node", "--import", "/app/lib/instrument.js", "/app/server"]
Wire Sentry into Express#
Sentry provides an Express error handler that captures unhandled errors. It must be registered after all routes but before your own error handler.
Update lib/app.js:
import * as Sentry from "@sentry/node";
import express from "express";
import { errorHandler } from "./errorHandler.js";

export default function appFactory(serviceLocator) {
  const db = serviceLocator.db;
  const app = express();
  app.use(express.json());

  // ... routes ...

  // Sentry must come before the custom error handler
  Sentry.setupExpressErrorHandler(app);
  app.use(errorHandler());

  return app;
}
Get your Sentry DSN#
Ask your team's Sentry administrator to create a new project for your service. They will provide you with the DSN.
Add SENTRY_DSN to the Virtual Environment#
Add the Sentry DSN as a placeholder in tools/virtual-env.sh inside _venv_main_development:
export SENTRY_DSN=""
Then set the real value in tools/sensitive-env.sh (git-ignored):
export SENTRY_DSN="https://examplePublicKey@o0.ingest.sentry.io/0"
Verify#
Start the server and trigger a test error:
// Add a temporary test route in lib/app.js
app.get("/tooling/test", async (_, res) => {
  Sentry.captureException(new Error("Test error for Sentry"));
  res.json({ message: "Error sent to Sentry" });
});
Visit http://localhost:3000/tooling/test, then check your Sentry dashboard — the test error should appear within a few seconds.
Remove the test route once you've confirmed Sentry is working.
API Authentication Middleware#
This section covers protecting your API routes with an API key middleware.
The middleware validates an x-api-key header against a master key stored in the config. It is applied per-route group so you can keep health-check endpoints like /api/ping publicly accessible.
Create the Middleware#
mkdir -p lib/middlewares
lib/middlewares/authenticateMasterKey.js
import httpErrors from "http-errors";

export function authenticateMasterKey(serviceLocator) {
  const { config } = serviceLocator;
  const { masterAPIKey } = config;

  if (!masterAPIKey) {
    throw new httpErrors.InternalServerError(
      "Master API Key is not configured",
    );
  }

  return function (req, res, next) {
    const clientApiKey = req.get("x-api-key");

    if (!clientApiKey) {
      throw new httpErrors.Unauthorized("Missing or invalid API key");
    }

    if (clientApiKey !== masterAPIKey) {
      throw new httpErrors.Unauthorized("Invalid API key");
    }

    next();
  };
}
The middleware is a factory that reads the master key from the service locator once, then returns a standard Express middleware function. This means the key lookup happens at startup, not on every request.
Apply the Middleware to Routes#
In lib/app.js, apply the middleware to the route groups that need protection:
import { authenticateMasterKey } from "./middlewares/authenticateMasterKey.js";
import exampleHandler from "./handlers/example.js";

// Public — no authentication
app.get("/api/ping", async (_, res) => {
  const result = await db.query("SELECT NOW() as timestamp", []);
  res.json({ message: "pong", data: result.rows });
});

// Protected — requires x-api-key header
app.use(
  "/api/v1/example",
  authenticateMasterKey(serviceLocator),
  exampleHandler(serviceLocator),
);
Add MASTER_API_KEY to the Virtual Environment#
The MASTER_API_KEY should already be set in tools/virtual-env.sh from the Database Setup section:
export MASTER_API_KEY=hello
In production, set this to a strong, randomly generated value via your deployment configuration.
Verify#
Test that unauthenticated requests are rejected:
# No API key — should return 401
curl -s http://localhost:3000/api/v1/example | jq
# {"message":"Missing or invalid API key"}

# Wrong API key — should return 401
curl -s -H "x-api-key: wrong" http://localhost:3000/api/v1/example | jq
# {"message":"Invalid API key"}

# Correct API key — should return 200
curl -s -H "x-api-key: hello" http://localhost:3000/api/v1/example | jq
For the recommended way to organize handlers behind authenticated routes, see the API Structure & Routing section.
Swagger API Documentation#
This section covers setting up auto-generated API documentation using swagger-jsdoc and swagger-ui-express.
Install Dependencies#
npm install swagger-jsdoc swagger-ui-express
Create the Swagger Spec#
Create a directory for Swagger configuration and the spec file:
mkdir -p lib/swagger
lib/swagger/swagger.js
import swaggerJsdoc from "swagger-jsdoc";

const options = {
  definition: {
    openapi: "3.0.0",
    info: {
      title: "My API",
      version: "1.0.0",
      description: "API documentation",
    },
    servers: [
      {
        url: "/api/v1",
        description: "API v1",
      },
    ],
    components: {
      securitySchemes: {
        ApiKeyAuth: {
          type: "apiKey",
          in: "header",
          name: "x-api-key",
        },
      },
    },
    security: [{ ApiKeyAuth: [] }],
  },
  apis: ["./lib/swagger/docs/**/*.doc.js"], // targets doc.js files only
};

export default swaggerJsdoc(options);
Update the
title,version, anddescriptionto match your project.
Add API Documentation Specs#
Create a directory for the documentation files:
mkdir -p lib/swagger/docs
Each documentation file describes one group of endpoints. For example:
lib/swagger/docs/example.js
/**
 * @openapi
 * /example:
 *   post:
 *     summary: Create a new example record
 *     tags: [Example]
 *     requestBody:
 *       required: true
 *       content:
 *         application/json:
 *           schema:
 *             type: object
 *             required:
 *               - name
 *             properties:
 *               name:
 *                 type: string
 *                 example: "My record"
 *     responses:
 *       201:
 *         description: Record created successfully
 *       400:
 *         description: Invalid request body
 *
 *   get:
 *     summary: Get an example record by UUID
 *     tags: [Example]
 *     parameters:
 *       - in: path
 *         name: uuid
 *         required: true
 *         schema:
 *           type: string
 *           format: uuid
 *     responses:
 *       200:
 *         description: The example record
 *       404:
 *         description: Record not found
 */
Mount Swagger UI#
Add the Swagger UI middleware to lib/app.js, before any authenticated routes so the docs are publicly accessible:
import swaggerUi from "swagger-ui-express";
import swaggerSpec from "./swagger/swagger.js";

// Inside appFactory, before routes:
app.use("/api/docs", swaggerUi.serve, swaggerUi.setup(swaggerSpec));
Verify#
Start the server and visit http://localhost:3000/api/docs — you should see the Swagger UI with your documented endpoints.
In production, you may want to disable the docs endpoint. You can conditionally mount it based on
NODE_ENV.For a more populated example of Swagger doc files, see the ai-rank-tracker swagger docs.
Re-enable CI Pipeline#
Back in step 3 we deleted .gitlab-ci.yml to avoid broken pipelines during setup. Now that the application, tests, and linting are in place, it's time to bring it back.
Create .gitlab-ci.yml#
.gitlab-ci.yml
stages:
  - lint
  - test
  - deploy

default:
  tags:
    - k8s-small

variables:
  HARBOR_REGISTRY: harbor.one.com
  IMAGE_NAME: rankmath/$CI_PROJECT_NAME
  BUILD_IMAGE_NAME: ${HARBOR_REGISTRY}/$IMAGE_NAME:$CI_COMMIT_SHORT_SHA

###############################################################################
# Stage: lint
lint:
  image: ${HARBOR_REGISTRY}/nodejs/node:22.14.0-noble
  stage: lint
  script:
    - npm ci
    - npm run lint

###############################################################################
# Stage: test
unit-test:
  stage: test
  image: ${HARBOR_REGISTRY}/nodejs/node:22.14.0-noble
  script:
    - npm ci
    - npm run test:unit

integration-test:
  stage: test
  image: ${HARBOR_REGISTRY}/nodejs/node:22.14.0-noble
  tags:
    - docker-in-docker
  services:
    - name: ${HARBOR_REGISTRY}/systems/postgresql:16.8-3-bookworm
      alias: postgres
  variables:
    NODE_ENV: ci
    POSTGRES_DB: nodejs-api-dev       # Replace with your project's database name
    POSTGRES_USER: nodejs-api-dev     # Replace with your project's database user
    POSTGRES_PASSWORD: $TEST_POSTGRES_DB_PASSWORD
    POSTGRES_PORT: 5432
    POSTGRES_HOST: postgres
    POSTGRES_SSL: disable
    MASTER_API_KEY: hello
    SENTRY_DSN: $SENTRY_DSN
  script:
    - npm ci
    - node tools/bin/db migrate
    - npm run test:integration

###############################################################################
# Stage: deploy

.deploy-template:
  image: ${HARBOR_REGISTRY}/saas/update-deploy-repo
  stage: deploy
  script: update-deploy-repo
  variables:
    DEPLOY_REPO_PROJECT_ID: "0000"  # Replace with your deploy repo project ID
    CHART_NAME: nodejs-api           # Replace with your chart name
    DEPLOY_REPO_REF_FILE_PATH: ref.app.${RELEASE_ENVIRONMENT}.txt

deploy-test:
  extends: .deploy-template
  only:
    - develop
  variables:
    RELEASE_ENVIRONMENT: test

deploy-staging:
  extends: .deploy-template
  rules:
    - if: '$CI_COMMIT_BRANCH == "develop"'
      when: manual
  variables:
    RELEASE_ENVIRONMENT: staging

deploy-production:
  extends: .deploy-template
  only:
    - main
  variables:
    RELEASE_ENVIRONMENT: production
Replace
DEPLOY_REPO_PROJECT_ID,CHART_NAME, andIMAGE_NAMEwith values matching your project.The deploy stage requires a deploy repo to be created first. See the Deployment Guide for instructions on setting that up. Until then, only the lint and test stages will run.
Pipeline Overview#
| Stage | Job | What it does |
|---|---|---|
| lint | lint |
Runs npm run lint (ESLint + Prettier) |
| test | unit-test |
Runs unit tests |
| test | integration-test |
Spins up a PostgreSQL service container, runs migrations, then runs integration tests |
| deploy | deploy-test |
Auto-deploys to test on pushes to develop |
| deploy | deploy-staging |
Manual deploy to staging from develop |
| deploy | deploy-production |
Auto-deploys to production on pushes to main |
CI-specific Notes#
- Integration tests in CI use a PostgreSQL service container provided by GitLab, not a Docker-in-Docker container managed by
test/setup/utils.js. TheNODE_ENV=civariable ensures the test setup skips its own database container (sinceNODE_ENV !== "test"). - Sensitive variables needed by CI (like
TEST_POSTGRES_DB_PASSWORD) should be configured in GitLab > Settings > CI/CD > Variables — never hardcoded in the YAML. Sensitive variables not needed in CI (likeSENTRY_DSN) will be configured as sealed secrets in the deployment repo. - The node image version (
22.14.0) should match your.nvmrc— update both together when upgrading Node.